Last summer when I posted about my
first baby quilt, I shared a few of the steps in putting together a disappearing-nine-patch pattern but someone asked me to attempt to put together a tutorial on it . . . so here it goes!
First step is picking out your fabric. I had about 7 different fabrics; ideally I think I would have had 9 or more, but it worked just as well. The more fabric options you have the more combinations you can create so each block will look different.
Start by cutting them in 5x5 squares - or you can buy a charm pack which are pre-cut to that size. Then sew 9 squares together in rows of 3 as pictured below.
Next you'll cut your large square into four -- down the middle in both directions. See the image below. Try to get cut them accurately (I know now, that if you don't, the seams will be off when you put the whole thing together.)
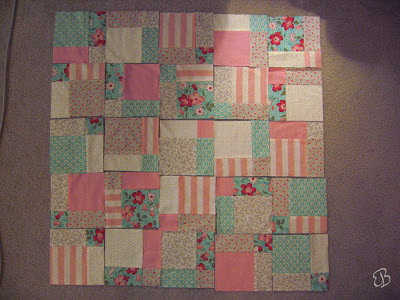
Once you have all of your squares cut you can lay them out in a way that looks pleasing to you. This can take a while as you try to avoid matching like fabrics together. I did my best here but still ended up having a few of them end up together.
I would recommend taking a digital photo that you can look at often when you are at your sewing machine -- that way you know you are sewing the right squares together in the right direction! I've had to rip out a few before just because my stack got rotated half way through!
I sewed my rows together from the left to right, then once I had all five rows sewn, I sewed each row to the one below it until they were all together. (A picture I didn't take was how you line up each row and match the seams. It's important to match up the seams and helpful if you pin the seams together before sewing.)
See the finished top piece below!
After the top piece is finished, you are almost done! Create a sandwich with the bottom piece (a few inches bigger on all sides than the top piece), the batting (also a few inches bigger in case of shifting during quilting), and the top. Pin these together every four inches or so to avoid wrinkles/pinched fabric. Now you're ready to quilt it! For this quilt, I did a free-motion machine stitch, but you can see
here of the echo stitching I did last time.
The final step is to attach the binding -- which will have to be another tutorial.
Thanks for reading! Good luck!


